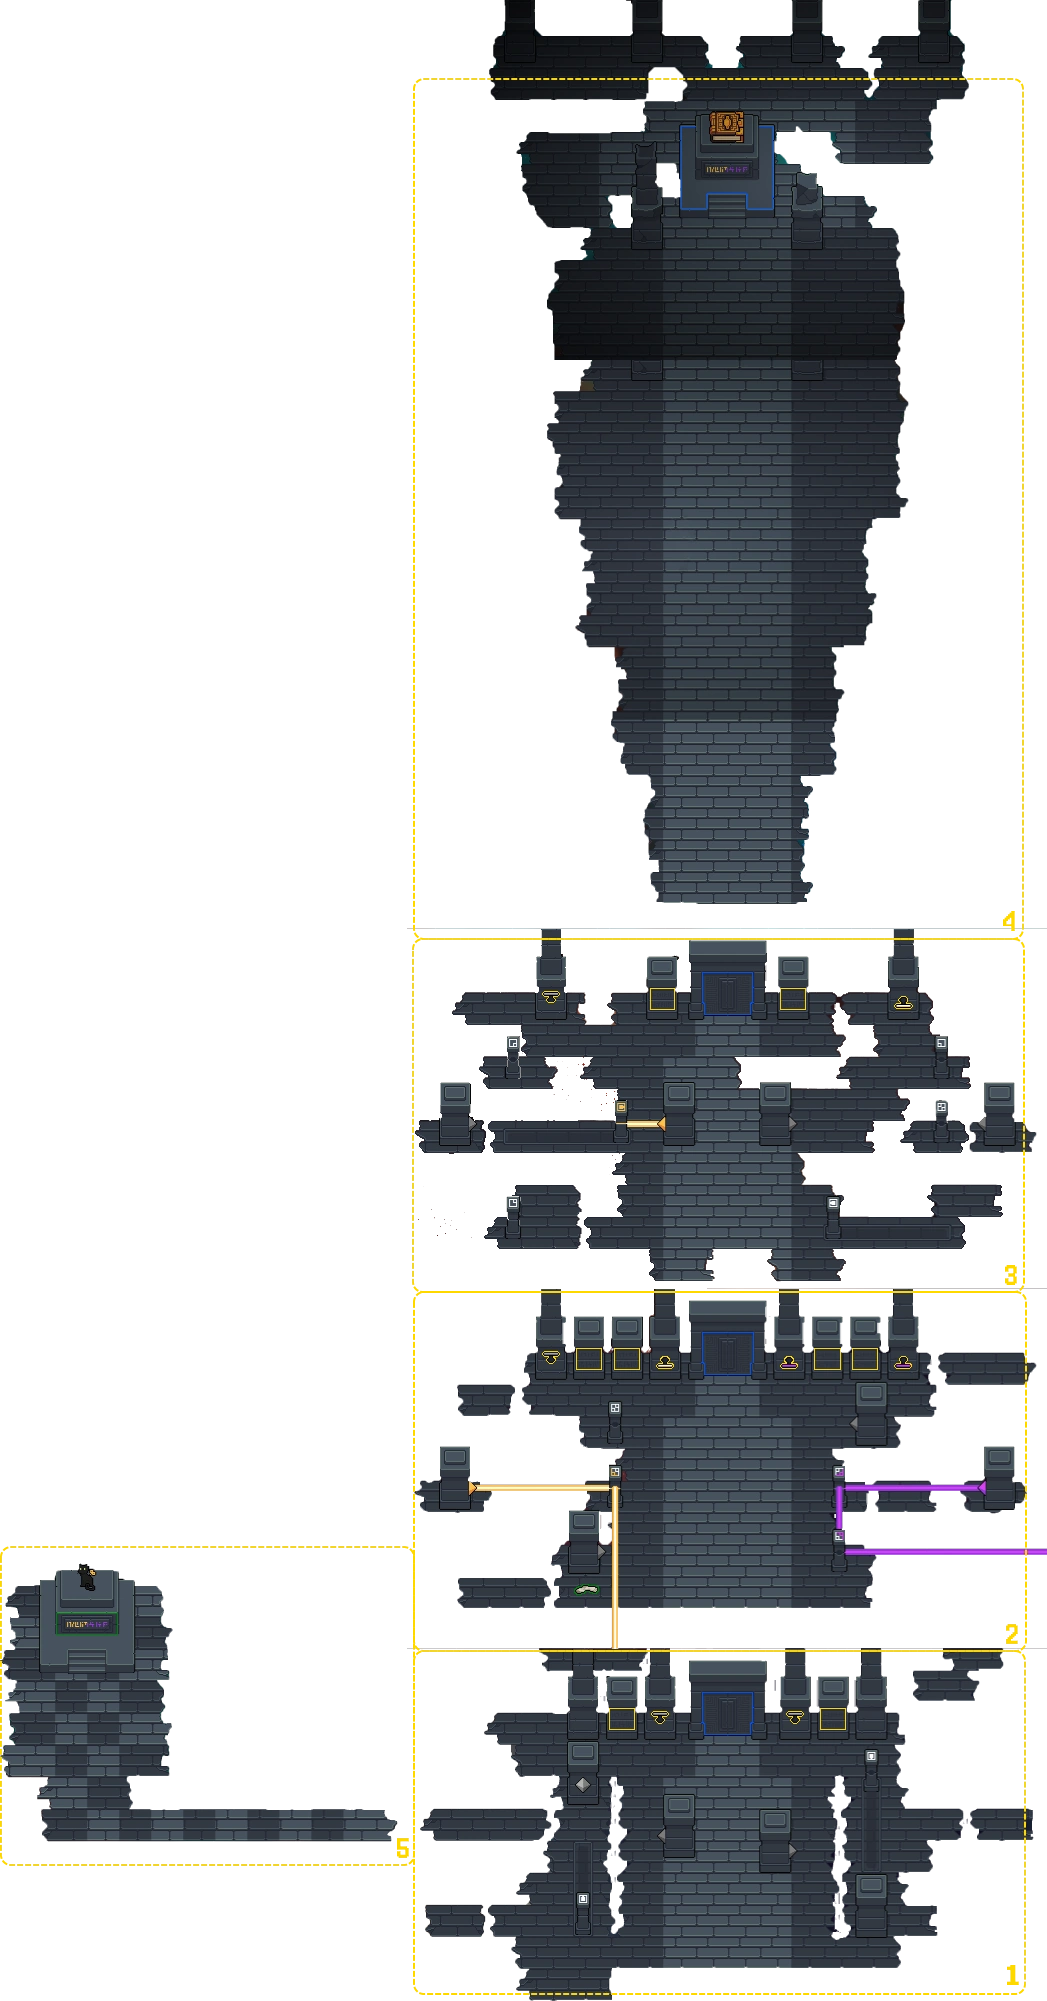
Interaction Map
The Trial Between Worlds is a location in Heartbound accessible only through the grandfather clock in The Spine.
The Trial Between Worlds consists of 5 rooms; 3 puzzle rooms, 1 item room, and one secret room. The look of this place is described as decrepit and falling apart.
The rooms all follow the same general design formula. There is a central stone platform on which there is a puzzle or walkway. Surrounding this stone platform is a shifting backdrop of colors, shapes, and stars.
The Trial Between Worlds is the third location in Heartbound's Act 1. It contains three puzzles of increasing difficulty, that consist of lasers and movable columns that are used to divert the route of the laser.
Sublocations[]
Puzzle Room 1[]
The player can solve the puzzle by moving both columns align the visible path and then activating the switches.
The columns near the exit read:
"It must be sealed away..."
"There is power within it...".
Puzzle Room 2[]
The puzzle can be solved by using the switches in the following order (from left-to-right):
Note that using the third switch will damage the first purple column which will prevent the player from reading its text.
The columns near the exit read:
"The guardians must protect it..."
"The power is too great...".
"We must obtain it..."
"Bend the power to our will...".
Puzzle Room 3[]
In order to solve the puzzle:
- Move the bottom column along the path.
- Deactivate the switch to the right.
- Move the top column along the path.
- Reactivate the switch to the right.
- And finally, activate the switch to the left.
The columns near the exit read:
"We will keep them safe with it...".
"We will save them from its power...".
Final Room[]
Upon completion of all the puzzles, Lore will be confronted by The Artifact, which will disrupt the connection between Lore and Binder, and ultimately send Lore to the Dark World. This item room contains The Artifact on a pedestal that glows both yellow and purple. A cutscene occurs before it can be determined what the pedestal says.
Secret Room[]
The secret room contains a wind-up cat on a pedestal that glows both yellow and purple. When interacted it'll say: "Want me to come with you?" making the player choose either yes or no. Upon saying yes, the cat fades away and says: "Alright, see you soon!" before appearing in Lore's Room. Reject its offer and it will disappear with a different message: "Well that's not very nice", doing this will cause it not to follow you.
The pedestal does not say anything.
Trivia[]
- The cat in the Secret Room is called Gizmo, which is one of Thor's cats in real life.
Media[]
")